
It’s no secret that I love a craft project. Gnomes seem to be everywhere again this holiday season. They’re super cute and bring a bit of whimsy to your home. I made my mother in law a couple of super cute gnomes for her birthday and on Thanksgiving we got to crafting and made some more for friends and family. You can make one too! They are wicked easy to make and are a perfect Sunday project.


Holiday Gnomes
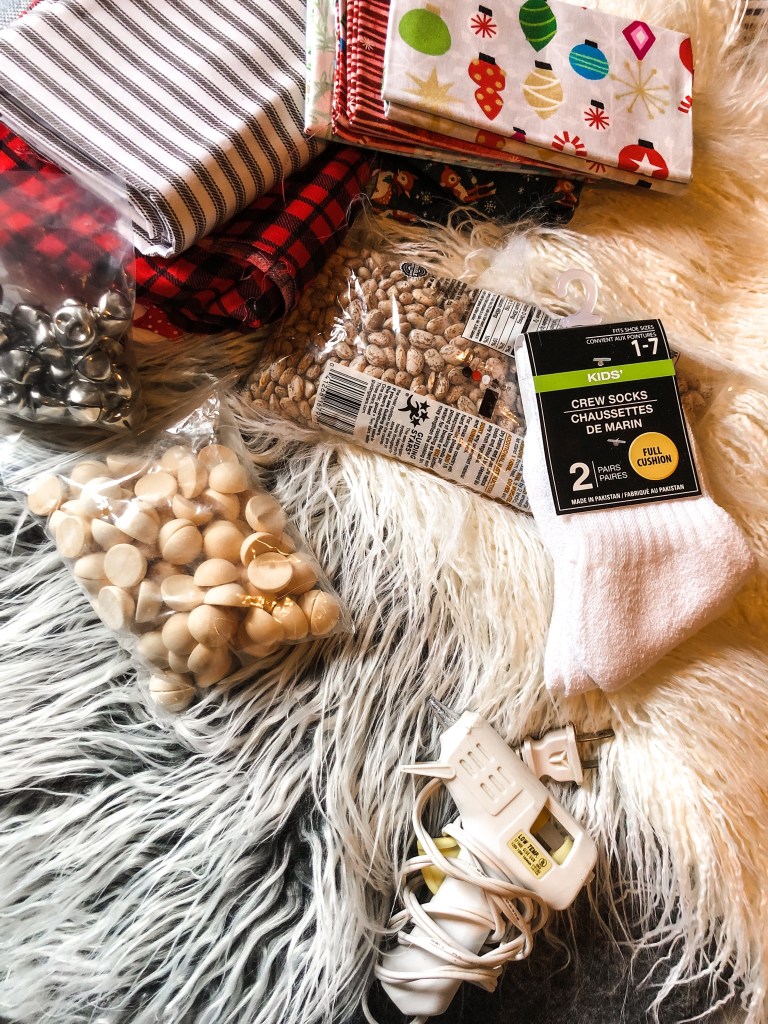
What you need:
- Socks ( I picked ours up at Dollar Tree)
- Bags of beans
- Scissors
- Rubber bands
- Mongolian fur or craft fur. Mongolian fur will give you a better look, but it is a little more expensive. Here are the two we used: this gray Mongolian fur, and this pretty ivory fur. (super fast shipper btw)
- Razor blade or X-ACTO knife
- Wooden half balls (I’m not sure what to call them) for the nose
- Hot glue gun
- Festive fabric
- Bells or small decorations (optional)


Directions:
- Put a bag of beans inside one sock to make your gnome body. Put a rubber band around the open end of the sock, once it’s tightly closed, trim off the excess sock.
- Do a quick measure with the fur around the sock. Just wrap it around to see how much you’ll need. You’re going to make a rainbow cut, or a U cut to make the beard. You may want to draw the shape on the back of the fur to guide you.
- Now, this is where you want your blade/X-ACTO knife. Carefully make your rainbow cut by only cutting the fabric backing of the fur. This may take a little elbow grease but it’s worth it. Pull your cut piece away and you’ll see why you used a blade and not scissors. You get that great natural beard look!
- Place the beard on the “body” to check the fit. If it looks good, add a drop of hot glue to the upper center of the body and press the beard firmly. Glue the rest of the fur onto the sock. I only put glue on the top edge of the beard.
- Make a little space for the nose by pulling apart the fur. Add glue to the wooden ball and stick the nose in place.
- Time for the hat! Measure a piece of fabric around the top of your gnome. Also, measure a length that you like for the height of the hat. There are no rules, you can have a short stubby hat or a long one. It’s up to you. Cut the fabric in a triangle shape so you have a nice pointy hat.
- If you have a sewing machine you can be all fancy and sew this into a cute hat. I didn’t feel like bringing mine out so I did a long strip of hot glue, pressed it together and voila! Hat. Just make sure to have you fabric “inside out” so after you sew or glue you can turn in right side in….right side out…you know what I mean, right?
- Check your hat to make sure it fits on your new little gnome friend and then add some decorations. You can add a little bell, fake flowers, buttons, etc. Glue the hat on after any embellishments.


These gnomes will surely bring some extra cozy and whimsy to your home during the holiday season. They are relatively easy and come together in about 30 minutes. If you have any questions leave me a comment and I can hopefully help!
Happy Holiday Crafting!

